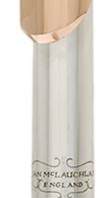
What I am intending to do over my next few blog posts is to describe the processes involved in producing a headjoint, from tubes and sheets of metal through to the finished product. I am not for one moment suggesting that this is the only way of making a headjoint, but it is one that I use and which works well for me.
This, the first article, aims to describe how the tube is made, and then in the following issues I will look at lip-plates, assembly and final testing.
The tube is one of the most important sections of the headjoint when it comes to the sound. The tube is tapered, with the open end being about 2 to 3mm larger in diameter than the crown end. This taper (which is curved – not straight) helps to keep the octaves in tune and give an easy and even response to all three octaves of the flute.
There are three common materials used for making headjoints; gold, silver and nickel silver (usually silver-plated). Excellent headjoints can be made from all three materials, but most flute players seem to think that silver has a wider potential for tone colour than the others. It is also worth saying that bad headjoints can be made in all three materials!
The headjoint is made in basically one of two ways:
1. Starting from a cylindrical tube of metal
2. Starting from a sheet of metal
Method one is by far the commonest and involves the following steps to taper the tube:
- Place the cylindrical tube on a tapered steel bar (shaped like the inside of the finished tube) called a mandrel.
- Fix the top of the tube to the mandrel, to stop it slipping.
- Push the mandrel – with the tube on it – through a lead block with a hole in it. The hole in the block starts the same size as the small end of the tube: as the mandrel is pushed through the hole, the tube is squeezed tightly onto the mandrel, giving the tube its final shape.
Method two is similar to method one, except the tubing is made from a flat sheet made to form a cylinder. The edges are then silver soldered together, and the resulting cylinder is then tapered using the above method.
Following the shaping of the tube, the outside is polished, ready to have the lip-plate and riser soldered to it.
To make the tube is not really all that difficult, but time and practice is required to give the tube an absolute mirror-like appearance. A headjoint must play wonderfully, but it must also look the part!
In my next article, I’ll discuss making the lip-plate.
This article was originally written by Ian McLauchlan for Flutewise.

